Sie müssen kein professioneller Kartograph oder Designer sein, um binnen Minuten beeindruckende, großartige Karten zu gestalten – sei es Stadtpläne, Wanderkarten, Anfahrtsskizzen, touristische Karten oder Lagepläne.

Wir versprechen: Der Printmaps-Editor wird Ihnen viele Stunden des Karten- und Routenzeichnens sparen. Wollen Sie hochauflösende Karten für Immobilienexposés oder Reiseführer drucken, benötigen Sie eine Druckdatei mit allen Karten-Elementen als eigene Ebenen oder wollen Sie Ihre Reiseroute nachzeichnen? Nachfolgend erklären wir die Funktionen der drei Schritte des Editors: Karte designen, Inhalte hinzufügen und Karte herunterladen.
1. Gestalte deine Karte
Im ersten Schritt können Sie die Grundeinstellungen deiner Karte anpassen. Bestimmen Sie den Kartenstil und die Dimensionen der Druckdatei, wählen Sie die wesentlichen Eigenschaften der Karte und kippen oder rotieren Sie sie. Auch Größe und Sprache der Beschriftungen können Sie hier anpassen, sowie entscheiden, welche Kartenelemente Sie ausblenden wollen.
Weltweite Kartografie in allen Zoomstufen
Wir bieten Kartografie in allen Ländern der Welt und in allen Maßstäben. Zoomen Sie so hoch oder tief wie Sie möchten.
Dimensionen der Karte Ändern
Wählen Sie die Druckmaße der Karte im ersten Schritt. Sie können eine der Standardgrößen wählen oder individuelle Dimensionen in mm bestimmen. Achtung: Karten mit einer Seitenlänge ab 22cm sind als PNG nicht verfügbar, Karten ab einer Seitenlänge von 66cm sind nur als SVG/AI verfügbar. Genauere Infos dazu auf unserer Seite zu den Preisen.
Ziehen Sie die Karte mit deinem Cursor herum, um den richtigen Kartenausschnitt zu bestimmen. Achtung: die maximale Dimension einer Printmap ist 133x133cm. Vergessen Sie nicht, den Kartenausschnitt zu sperren sobald Sie den richtigen gewählt haben. So kann es zu keinem versehentlichen Verschieben kommen.
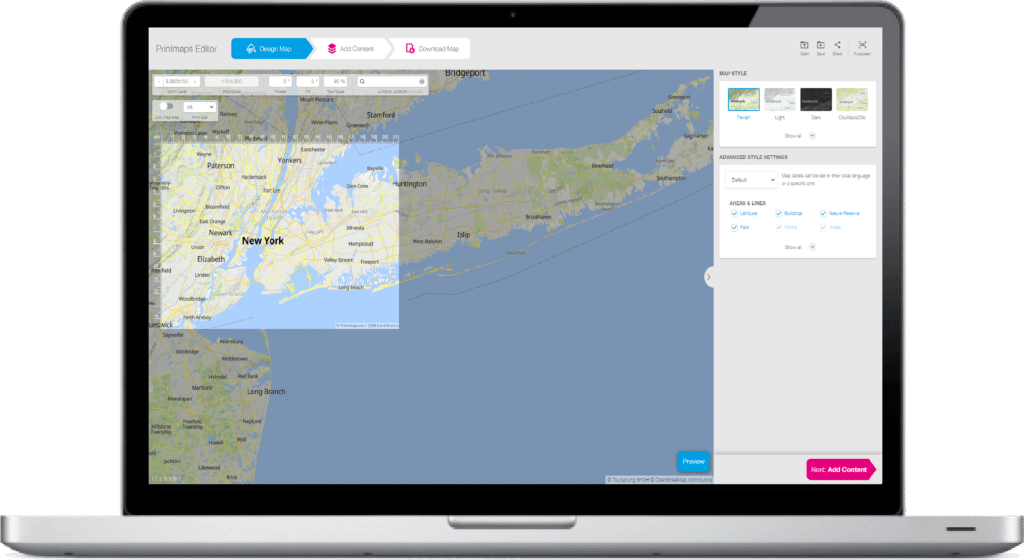
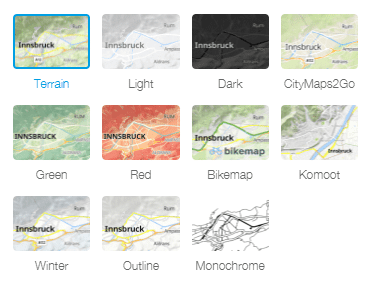
Wählen Sie Ihren Kartenstil
Ihre Karte, Ihr Stil. Wählen Sie zwischen vordefinierten Kartenstilen, von einer Geländekarte zu Winter- und Stadtplan-Stilen sowie Übersichtskarten. Dazu die Kartenstile von Komoot, Bikemap biking tours und CityMaps2Go.
Gestalten Sie selbst
Wählen Sie Ihr eigenes Design, indem Sie die Elemente, die Sie in Ihre Karte aufnehmen möchten, an- oder abwählen. Sie können sie so umfangreich oder leer gestalten, wie Sie möchten. Mit nur wenigen Klicks erstellen Sie leere Landkarten für Bundesländer, Provinzen oder Staaten.
Kippen und drehen Sie die Karte
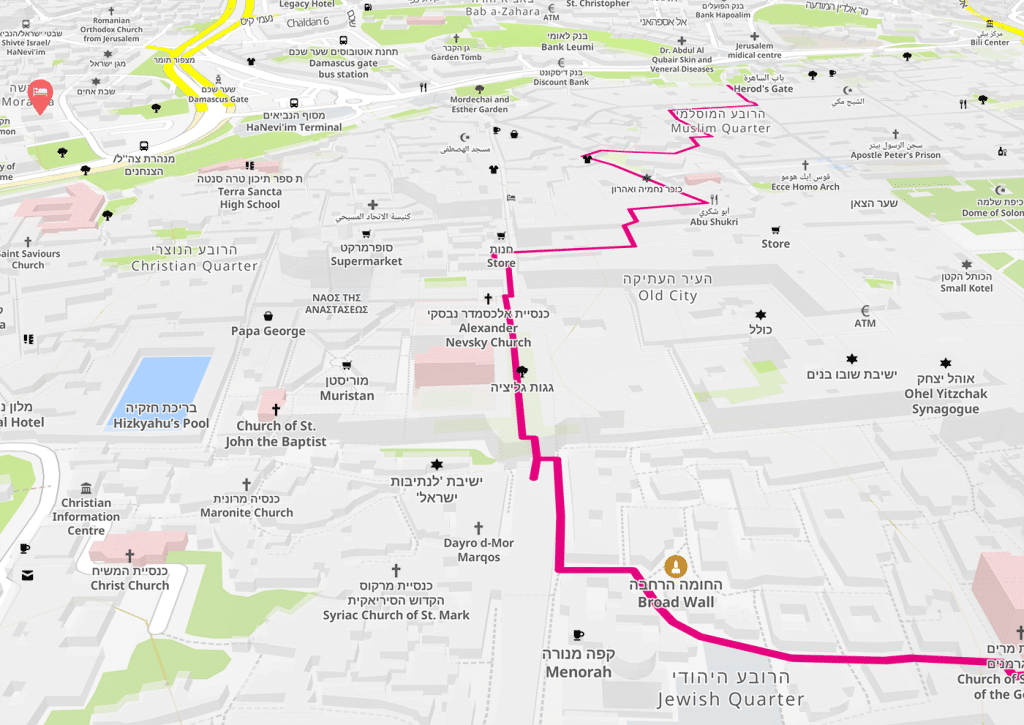
Drehen Sie die Karte rundherum, um sie in jeder gewünschten Richtung anzuzeigen. Neigen Sie die Karte um bis zu 60°, um die Perspektive zu verbessern. Ideal für Immobilienkarten, Hotellagepläne oder Stadtrundgänge. Hinweis: Gekippte und gedrehte Karten sind nicht als SVG verfügbar, sondern nur als PSD oder PNG.
2. Inhalt zu Ihrer Karte hinzufügen
Unter dem Tab “Inhalte hinzufügen” können Sie eine Route zeichnen, eine GPX-, KML- oder GeoJSON-Datei (aufgezeichnete Route) hochladen, POIs hinzufügen und geographische Formen einzeichnen.
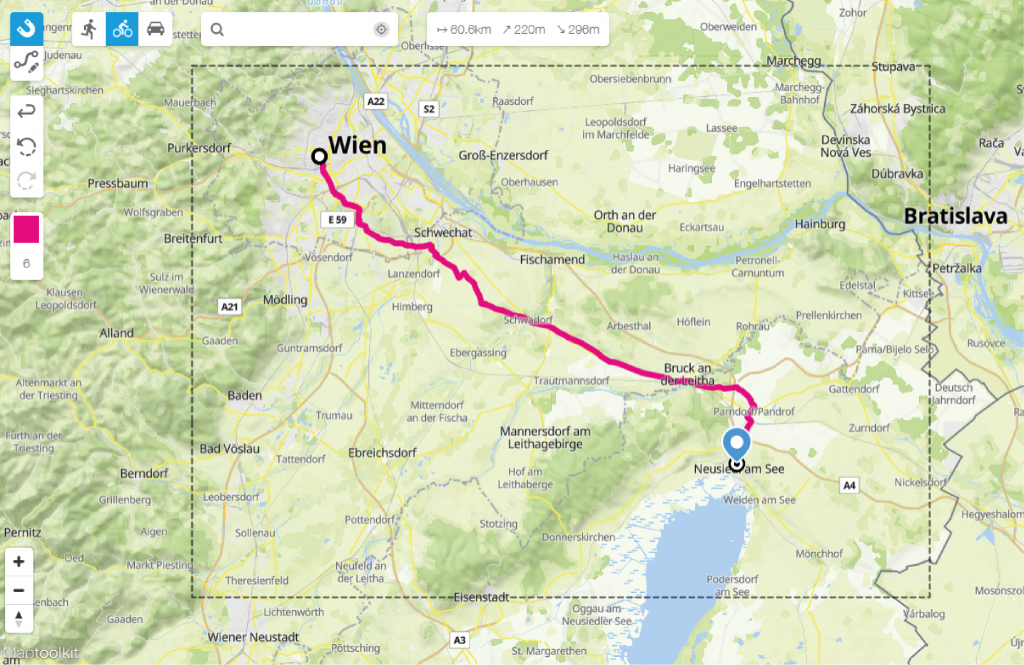
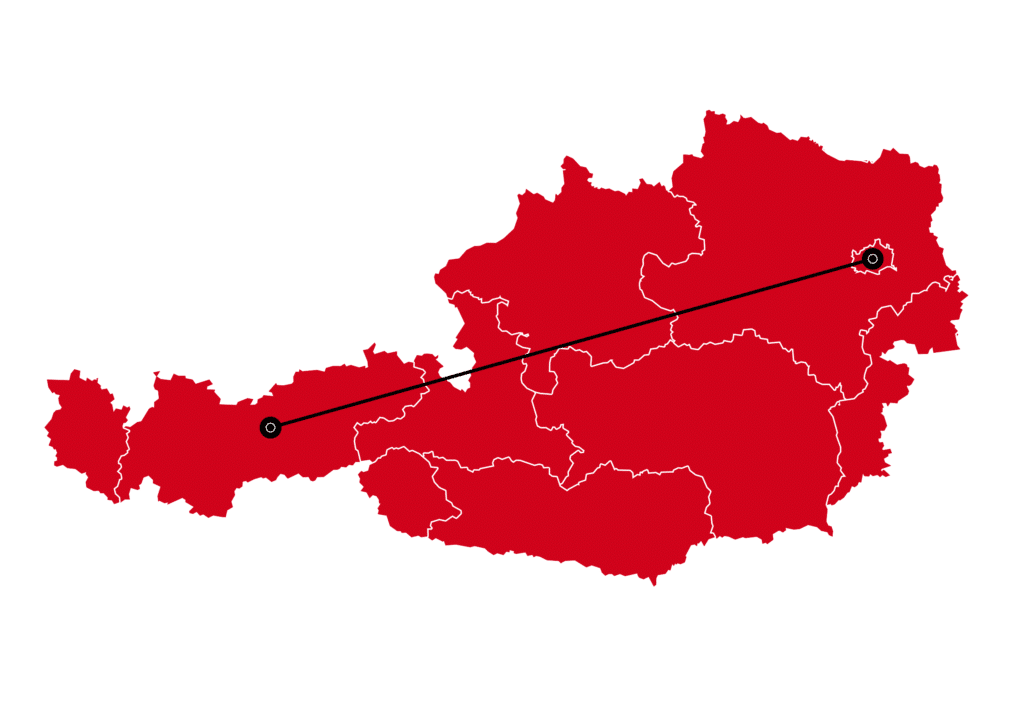
Zeichnen Sie eine Route
Sie möchten eine Route in Ihre Karte einfügen? Mit unserem magnetischen Zeichenwerkzeug ist das ganz einfach. Sie mögen es lieber freihändig? Keine Sorge, auch das unterstützen wir. Im „Einfachen Modus“ können Sie Routen zeichnen, indem Sie die Zielpunkte in die Suchleiste eingeben. Im „Expertenmodus“ können Sie Routen zeichnen, indem Sie auf die Zielpunkte in der Karte klicken. In beiden Modi können Sie entweder gerade oder bogenförmige Linien zeichnen oder eine Linie zeichnen, die magnetisch an vorhandenen Straßen einrastet. Passen Sie die Dicke und Farbe der Linie an. Entscheiden Sie, ob Sie die Reisemodus-Symbole (Flugzeug, Zug, Auto, zu Fuß, Fahrrad, Schiff) anzeigen oder ausblenden möchten.
Wie man aufgezeichnete Routen zur Karte hochlädt
Sie haben eine GPX- oder KML-Datei, die Sie in Ihre Karte aufnehmen möchten? Kein Problem, Sie können so viele hochladen, wie Sie möchten, und sie auf Ihrer Karte anzeigen lassen.
Unter der Schaltfläche „Datei hochladen“ finden Sie die Möglichkeit, GPX-, KML- oder GeoJSON-Dateien auf die Karte hochzuladen. Auf diese Weise können Sie Ihre aufgezeichnete Route auf einer hochauflösenden Druckkarte anzeigen lassen. Eine einfache Möglichkeit, eine GPX-Karte zu drucken.
Oft von Motorroutenmagazinen verwendet, perfekt für Führer mit Wander- und Radkarten oder Reiseblogs. Verewigen Sie Ihren Lieblingslauf in der Nachbarschaft oder einen Marathon an der Wand. Sehen Sie sich diese tollen Beispiele für Strava-Drucke an.
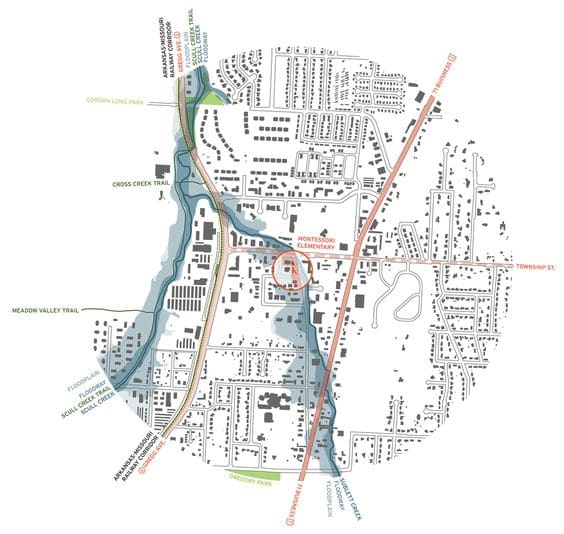
Karte mit individuellen Pins und Labels
Zeichnen Sie einzelne Points of Interest auf der Karte auf, indem Sie sie auf die Karte ziehen und platzieren, oder geben Sie ihre genaue Position in das Arbeitsblatt ein. Passen Sie ihre Größe an und wählen Sie aus einer Reihe von Farben und Symbolen, um sie zu gestalten.
Karte mit individuellen Pins
Wählen Sie aus den Standardmarkierungen und -etiketten oder laden Sie Ihre eigenen benutzerdefinierten Pins hoch. Suchen und laden Sie benutzerdefinierte Pins online herunter oder erstellen Sie Ihre eigenen. Karte mit Ihrem Unternehmenslogo oder einem anderen Bild, das Sie auf der Karte anzeigen möchten. Hinweis: Die Mindestgröße für das individuelle Pin-Bild beträgt 100x100px.
Mehrere Standorte kartieren
Zeichnen Sie mehrere Adressen gleichzeitig auf der Karte ein, indem Sie die Ortsliste in das Arbeitsblatt einfügen. Einfaches Kopieren und Einfügen aus Excel.
Wie man verschiedene Länder, Regionen oder Städte auf einer Karte einfärbt
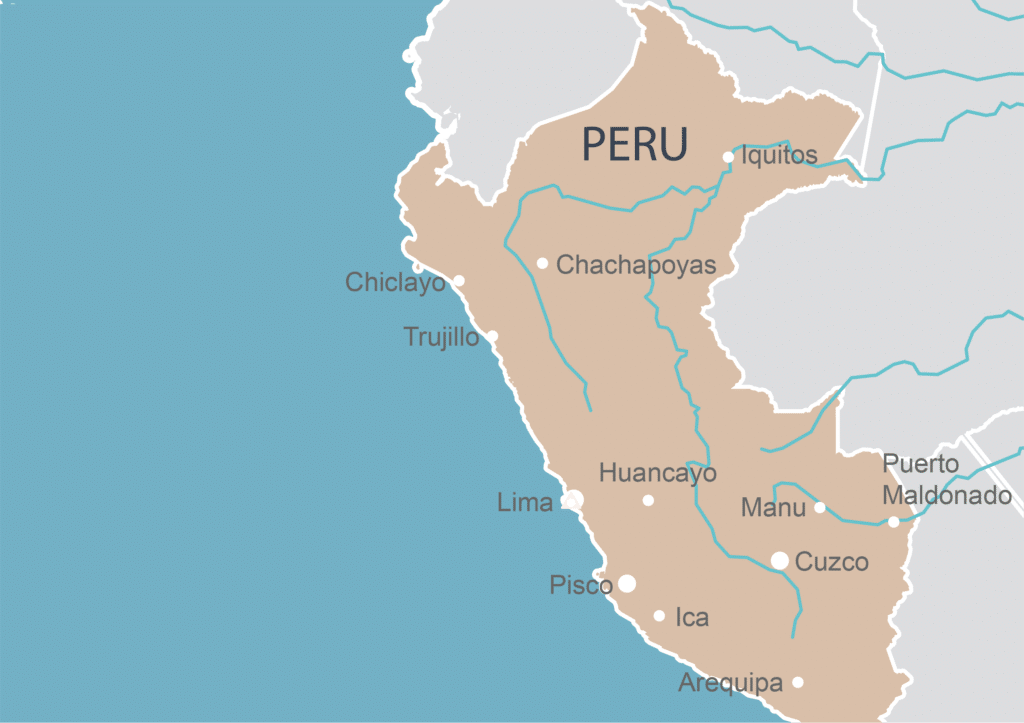
Mit dem Printmaps-Editor können Sie verschiedene Gebiete einfärben, indem Sie eine geografische Form auf sie legen. Wählen Sie Verwaltungsgebiete (Länder, Gemeinden, Regionen) aus unserer Datenbank. Das Hervorheben von Ländern auf einer Karte wird einfach, indem Sie die Länder auf der Weltkarte einfärben. Hinweis: Bislang ist es (noch) nicht möglich, ganze Kontinente auf einmal einzufärben.
Möchten Sie der Umgebung des Bereichs eine andere Farbe geben? Klicken Sie auf Invertieren. Sie können sowohl die Farbe als auch die Transparenz der Form ändern. Wählen Sie eine der Standardfarben oder geben Sie den HEX-Code oder die RGB-Werte der Farbe ein, die Sie anzeigen möchten!
Die perfekte Funktion, um Ihr Reiseziel hervorzuheben, wenn Sie beispielsweise eine Reisekarte für Ihr Fotobuch erstellen.
Grenzen hervorheben
Möchten Sie eine Grenze in einer anderen Farbe um die Form herum anzeigen? Dann legen Sie zunächst eine geografische Form mit Rand (wählen Sie „Linienstärke“) über die Fläche und dann eine geografische Form ohne Umriss darüber.
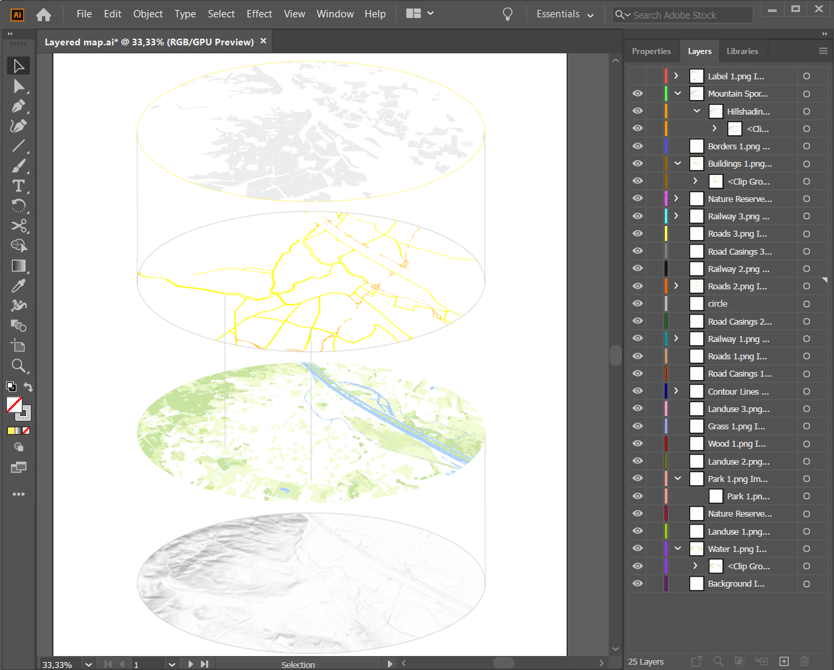
Ebenenliste
Der Printmaps-Editor arbeitet mit Inhaltsebenen. Ebenen können z. B. die Textbeschriftung, die Route oder eine farbige Form enthalten. Wie in anderen Editoren, z. B. Photoshop und Illustrator, können Sie die Ebenen verschieben. Wählen Sie eine Ebene aus und ziehen Sie sie nach oben, um sie über der anderen anzuzeigen. Wenn Sie den Mauszeiger auf eine Ebene in der Ebenenliste setzen, leuchtet sie in der Karte auf. Auf diese Weise sind die verschiedenen Ebenen leicht zu finden, und Sie können sie entfernen, ausblenden, bearbeiten oder ersetzen.
Wenn Sie die Karte als SVG- oder PSD-Datei herunterladen, bleiben die von Ihnen hinzugefügten Inhaltsebenen und die anderen Inhaltsebenen der Karte (Hügellandschaft, Straßen, Gebäude, …) erhalten. Die Beschriftungen werden mit eindeutigen Namen angezeigt, wenn Sie sie in Photoshop oder Illustrator öffnen.
Angenommen, Sie möchten ein Etikett verschieben – kein Problem. Der Inhalt unterhalb der Beschriftung bleibt davon unberührt. Ein guter Start als GIS-Kartenebene.
3. Ihre Karte herunterladen
Mit dem Printmaps-Editor können Sie hochauflösende Karten (300dpi) herunterladen, die beim Ausdrucken keine Details verlieren. Sie haben die Möglichkeit, die Karte als PNG-, PSD- oder SVG-Datei herunterzuladen. Die Wahl des Dateityps und die Anzahl der Kopien für die Druckauflage haben Einfluss auf unsere Preise.
PNG-Karte
Falls Sie die Kartenebenen nach dem Herunterladen der Karte nicht mehr benötigen, können Sie eine einfache PNG-Datei herunterladen. Braucht Ihre Karte noch einen letzten Schliff? Natürlich ist es auch nach dem Herunterladen noch möglich, der Karte mit anderen Bearbeitungsprogrammen zusätzliche Details hinzuzufügen! Perfekt für eine Reisekarte in Ihrem Fotobuch oder jede andere einfache Karte für den Druck oder die Online-Nutzung. Hinweis: Karten mit einer Seitenlänge von mehr als 220 mm sind nicht als PNG verfügbar.
PSD-Karte
Für Photoshop- Anwender ist eine PSD-Datei (Photoshop-Dokument) sehr nützlich. Hier bleiben die Ebenen der Karte erhalten und werden klar benannt, wenn Sie die Datei in Photoshop (oder Illustrator) öffnen. Ändern Sie zum Beispiel die Farben der Flüsse und ziehen Sie die Wasserebene nach oben, um sie oben in einem farbigen Land zu zeigen oder fügen Sie Textbeschriftungen in Ihrer Lieblingsschriftart hinzu.
SVG-Karte
Wenn Sie eine SVG-Karte herunterladen möchten, könnte der Printmaps-Editor eine gute Option für Sie sein. SVG-Bilder und ihr Verhalten werden in XML-Textdateien definiert. Das bedeutet, dass sie durchsucht, indiziert, mit Skripten versehen und komprimiert werden können. SVG-Bilder sind die perfekte Grundlage für die Erstellung interaktiver Karten.
Hinweis: Gekippte und gedrehte Karten sind nicht als SVG verfügbar.
Liste der Funktionen
Kartendesign |
|
|
|
|
|
|
|
|
|
|
|
|
|
|
|
|
|
|
|
|
|
| Verfügbare Lizenzen | Unlimited | Standard | Mini |
|---|---|---|---|
| Max. Druckauflage | unlimitiert | 35.000 | 1.000 |
Für erweiterte Funktionen wie API-Zugang, Whitelabeling, Wiederverkauf oder Affiliate-Zugang kontaktieren Sie uns bitte.
Probieren Sie Printmaps
Mit unserem Karteneditor können Sie in kürzester Zeit weltweit druckbare Karten erstellen.